Building a Pond
Basic
steps and guidelines to digging a backyard pond and watergarden
A
natural pond can be a thing of beauty, full of fish and surrounded
by turtles and frogs, covered with delicate aquatic flowers and plants.
Building a pond is not as difficult as you may think and there are
a few step-by-step instructions to follow if you want to build a pond.
You don't
need a lot of space to have a backyard pond in fact many people are
able to create interesting water features in very small spaces and
thanks to the new supply of inexpensive pond skimmers, filters and
more efficient pumps and water conditioners it has made owning a pond
easier than ever.
Rural dwellers may have the advantage because their property size
is often larger and a pond can take on large dimensions sometimes
becoming larger than one acre if the clay soil is ideal for water
retention.
There is no real limit to the size of pond that you can build but
if you're like us it is often based on a budget. Often ask me how
much does it cost to build a pond and there is no real answer.
A large pond from one quarter acre to three acres for example, that
requires mechanical shovels to build the dam and place large boulders
for landscaping around the pond will typically cost in the range of
$0.75 to $1.50 per square foot.
This will depend on the contractor you choose and the end result you
wish: a natural or swimming pond that has shorelines and rock features
to look like a natural lake, if done properly, will cost more than
if you open the yellow pages and choose an excavator who can dig you
a basic hole.
There is no right and wrong way but most of our clients do the work
themselves so we will concentrate more on building a small backyard
pond. Most of us know someone who has gone through the experience
of installing one and there are a few rules to follow if you want
to have a successful project that will be self-sustaining and won't
cost a fortune.
We'll assume that most people will be using a pond liner for their
pond as most of the properties in cities and towns is too porous to
support an unlined pond. We've seen people who have dug a large, lovely
shaped hole, in their backyard and gone through enormous work and
money to build a pond but then found that it didn't hold water and
they were then forced to restart from scratch and install the liner.
|
Pond
Books and Guides we recommend can be found on Amazon
As an
Amazon affiliate we may recieve payment for purchases made
through Amazon.
|
|
Earth
Ponds
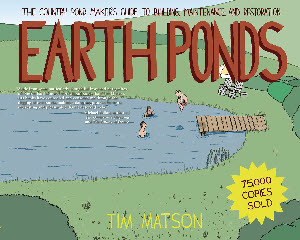
Earth Ponds: The Country Pond Maker's Guide to Building,
Maintenance and Restoration
There
is nothing like a pond! What else can simultaneously increase
your aesthetic pleasure, offer recreational opportunities,
help the environment, and increase the value of your land?
This is the recognized standard on ponds, now expanded to
include a comprehensive guide to living happily with your
completed pond and keeping it perpetually healthy.
Here is everything you need to know about planning, digging,
sculpting, and maintaining your pond.
Its the condensed wisdom of a man who has spent a lifetime
building, restoring, and maintaining ponds.
|
The
Pond Specialist
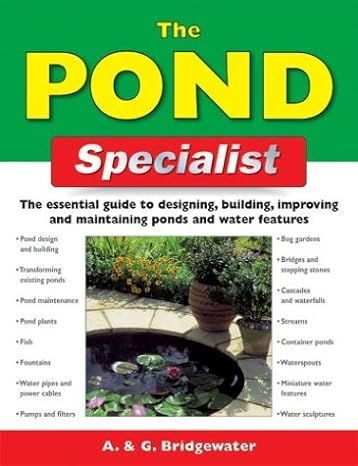
The Pond Specialist: The Essential Guide to Designing,
Building, Improving and Maintaining Ponds and Water Features
(Specialist Series)
This book is nothing less than essential for those of us embarking
on designing and building our own ponds.
If like me you have zero knowledge of the field and are clueless
as to the difference between types of pond, butyl liners versus
rigid liners, pond plants, fish and how water features actually
work, then this book will be your bible.
Imagine
building a waterfall, romantic fountain, or beautiful pond
in your own backyard.
|
The
Pond Book

The Pond Book: A Complete Guide to Site Planning, Design
and Management of Small Lakes and Ponds
Ponds, when properly managed, enhance a property. Ponds provide
an environment for fish, recreational entertainment through
swimming or boating, a satisfying wildlife habitat, and higher
real estate value to any rural property.
Written for the serious layperson, The Pond Book explores
the wide variety of pond ecosystems available, and their function;
topographic and soil requirements, design and construction
techniques, wildlife management, fish species and their cultivation,
local bylaws affecting pond maintenance, algae and plant control,
parasite problems, chemical and physical parameters of water
sources, and water control / erosion devices.
|
Managing
Lakes and Reservoirs
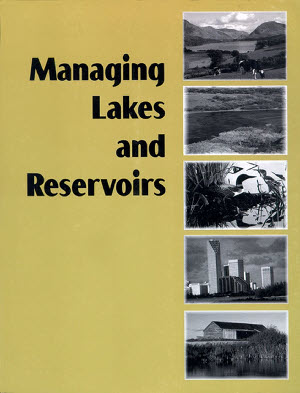
Managing Lakes and Reservoirs
Understandable and useful, Managing Lakes and Reservoirs addresses
the enormous amount of information on lake management that
has developed in the decade since the publication of the manuals
first two editions (Lake and Reservoir Restoration Guidance
Manual, 1988 and 1990).
The first two manuals dealt primarily with restoration of
lakes, but this third edition moves beyond restoration issues
to focus on ongoing management of lakes and processes that
communities of citizens, policymakers, scientists, and enforcement
agencies can use to achieve desired outcomes for their local
lakes.
Distributed for the North American Lake Management Society
|
Digging
a Pond
Once the preparations
have been done and your basic supplies are sitting beside the back
door and you've assembled your family and best friends it's time
to start doing the hard work. Take your time so you don't hurt your
back if you are using old fashioned elbow grease and be slow on
the accelerator if you are using a small back-hoe. The wheels of
the back-hoe can tear up a nice lawn so make sure the ground is
dry and you do as little turning on a dime as possible! We've seen
some lovely yards end up looking like a monster truck track after
an overzealous backhoe operator was a little too hard on the diesel
pedal!
Cut your sod
or turf and carefully place it in the shade in case you need to
re-sod any areas around the edge of the pond for the finishing touches.
Start by digging down to the depth you want and remember to use
an approximate 20 degree angle to the inner walls of your pond.
The slope of a natural pond tends to want to adhere to a 2:1 slope
but in your own construction think of 20 degrees as the ideal slope.
It is a very good idea to make steps from 6 to 12 inches wide at
8 inch depth variations to accommodate your aquatic plants and provide
a solid step for any rock features you will add later. Always dig
everything 2 inches deeper and wider than you want it to be to allow
for the sand backfill and the liners and geo textiles which will
be added.
Leveling the pond at this early stage is critical and the fastest
way to verify a centering of your pond is to place a 2 x 4 on its
edge across the length and width and to place a carpenter's level
on it. Adjust the sides as necessary until the bubble is centered;
this step is important because if the sides are not equal then you
risk having the liner not fit!
The Pond Report Online Store
|
Once the excavation
has been done lay a nice layer of sand in the entire pond and then
you can stretch your geo-textile and liner over the pond making
sure it is fairly snug against the steps you've formed. You don't
want to have the material stretching over corners so take the time
to slide everything into position with your fingers or use a rubber
mallet to carefully make everything flat. Place large stones or
cement pavers on the outside leading edge of the liner so it stays
in place and you can at this point turn on the garden hose and start
filling the pond.
Installing a molded or preformed pond
Most
pond stores can sell you a high density textured polyresin molded
pond with rigid side , flat bottoms and planting areas.
These inexpensive pre-formed ponds come in sizes from 100 gallons
to 220 gallons and even larger and when you buy one you can expect
to pay between a price of $150 and $300. They come in a variety
of shapes and some include a spillway built in to have two or more
placed together in an archipelago! Incredible things can be done
with these systems so use your imagination especially when it comes
to the water courses and plants you install once it's finished.
Place the moulded pond in your yard, again looking at it from the
house, and other angles to help imagine how the completed project
will look. Mark the final position on the lawn by pounding wooden
pegs every 8 inches around the plastic pond, then dig a hole slightly
larger (don't forget to keep the turf you've removed in the shade
and moist) and ensure the lip of the pond is a few inches above
the grass level.
Use the 2 x 4 and the carpenter's level to make sure it's level.
Always compact the earth beneath the pond before laying it; we like
to put a thin layer of sand in the hole first so we can adjust the
level of the pond afterwards. The edge of your molded pond should
rise two inches above the surrounding ground.
Pond
Liners & Membranes
So we'll
assume that you will be requiring a pond liner which is also called
a membrane. Smaller basins and backyard ponds only require a lightweight
material. We use a PVC, polyvinyl chlorine, membrane that will resist
frost and ultraviolet light.
Sunlight will damage cheap materials so it is best to ensure your
membrane has this protective feature, most do but you should ask
your supplier.
Most 20 mil membrane should cost around $1 per square foot and can
be bought in standard sized rolls or get a custom size piece cut
at your local garden supply store as most such retailers carry this
and the 35 mil liner that is slightly thicker and can buy for $1.50
per foot. The 20 mil and 35 mil materials should come with a 20
year warranty if you place a geo-textile protective barrier under
and on top of the liner.
Continued below...
Pond
Report Store
Suggested
References and Sites of Interest:
1.
Florida
Fish & Wildlife Conservation - Management of ponds
should take into account important conservation principles
2. Wiki Water Gardens wikipedia
Water Gardens
3. Flash animation: Dugout Aeration www.agr.gc.ca/pfra/flash/dugout/en/dugout_e.htm
4. Texas A&M AgriLife Extension Aquaculture, Fisheries, &
Pond Management http://fisheries.tamu.edu/aquaculture/aeration/
5. Low oxygen & pond aeration www.ca.uky.edu/wkrec/LowOxygenandPondAeration.htm
6. Quality Pond Aeration www.qualitypond.ca
7. Lake aeration systems www.vertexwaterfeatures.com
8. Pond aeration - Wikipedia en.wikipedia.org/wiki/Pond_Aeration
9. The Role of Aeration in Pond Management edis.ifas.ufl.edu/FA021
10. Atlantic
Pond Supply USA Atlantic
Pond Supply
11. Virgina
Soil & Water Conservation District - http://www.fairfaxcounty.gov/nvswcd/ponds.htm
Pond
Liners & Membranes
There is a 45
mil EPDM, ethylene-propylene-diene-terpolymer, heavy -duty membrane
that is available and we often use this strong and puncture resistant
material for waterfalls and streams between two basins. It can cost
from $0.80 - $1.50 per square foot. Using a thicker material will
reduce the risk of a breech or puncture which could result in you're
fixing a leaky pond. Luckily, these membranes can be repaired and
sealing foam is available to help with sealing a pond.
But before you buy pond liner and before you break the soil you
should draw the pond outline on your property. We use a rubber garden
hose to experiment with different shapes. By pounding in wooden
pickets or wooden pegs in various places you can create bends and
angles in the garden hose so you're pond design can be given a more
fluid look.
Keep in mind that the winning pond design is often the simplest
shape you would imagine. Think about how nature works in the natural
settings of the wilderness
small, often circular craters, when reflecting
the leaves and blue sky, can be the most memorable little ponds
you'll see!
Take a look
at the initial garden hose shape from many angles and don't forget
to go inside the house and look through the windows that open towards
the pond and see how the shape looks. Go to the upstairs rooms as
well as this is a critical step to help you see if your chosen shape
and position in the yard is giving proper sight lines. Make sure
your design will blend with the rest of your backyard or an adjacent
garden. Of course it is mainly common sense but the key is to take
time for the planning because once you start with the shovels it
is harder to change directions!
Calculating the pond liner size Many beginners take measurements
from their outline and do some rough calculations and then scurry
off to the pond supply store with such enthusiasm only to come home
with a specially-cut length of material to find that it is too small.
There is a simple formula to help calculate the dimensions of the
pond liner you'll need.
Width - The formula to determine the width of your membrane is 2
x pond depth + pond width + 2 feet = required width.
Length - The formula to determine the length of your membrane is
2 x pond depth + pond length + 2 feet = required length.
Looking
for a small pond pump? See Our Choices For Pumps on Amazon
As an Amazon affiliate we may
recieve payment for purchases made through Amazon. |
|
|
|
|
|
|
|
|
Waterfalls
& Water Courses
Before
we discuss the plantation of your pond lets talk a bit about choosing
a pump first for the circulation and water features you will add.
If you are planning on having a waterfall you should take heed of
the following way to calculate the pump for a waterfall flow: 100
gallons of water per hour for every inch of waterfall width.
So if your water
fall is two feet wide that is 24 inches which means you will require
a submersible pump that delivers 2400 gallons per hour, don't forget
to look carefully at the flow specifications of the pump as you
need to consider the head or height of your water flow.
The difference in height from the top of your waterfall to the depth
of your pump can significantly influence the total number of gallons
per hour; we find it better to have a slightly larger flow as opposed
to less flow because it's easier to bleed off any excess flow or
insert a control valve or ball valve if we need to but it's harder
to try and squeeze a little more flow from an undersized pump.
You can build a catchment pond at the highest point to create a
waterfall that flows naturally, or you can have the outlet of the
pump be the source of the waterfall. We've seen it done both ways
but one benefit of filling a pool at the top of the waterfall is
that the water tends to look a little more natural as it flows down
the stream or over the race way. Things to remember: keep your pump
in a screened filter box or a filter bag to prevent sediments and
debris from clogging the intake. You will incur some friction loss
for every 10 linear feet of tubing especially in smaller diameter
pipes like 1 or 2 inch pipes, it's about 1 foot of friction loss
or head loss for every ten feet (these inches will directly affect
the head capacity of your pump).
An example: To have a waterfall that is 18 inches wide and 3 feet
high which has 20 feet of tubing between the pump and the top of
the waterfall requires a pump that has the capacity to provide 1800
gallons per hour at 5 feet. Check the specs carefully and do the
math properly so there won't be any surprises.
Best
Plants for a Small Pond
The water
needs to be stabilized before you can safely introduce any sort
of life into your pond. Most people will use water directly from
the town or city supply which may be chlorinated so it's good to
allow the water to gas-off before you place your plants or add fish
another reason to allow the water to sit for a while is to allow
the temperature to adjust to the ambient atmospheric values. Pond
conditioners are available to combat the harmful effects of chlorine,
acid rains or chloramines and should be added properly following
directions before you plant.
Using planting baskets makes the most sense for backyard ponds because
we don't usually have soil planting beds in such small backyard
ponds. The planting basket allows small quantities of soil to be
used without the risk of causing murky water or have the soil get
disturbed by fish or circulation and just end up as muck on the
bottom. There is special pond soils that is formulated for use with
baskets and aquatic plants and your retailer should carry this;
regular dirt isn't recommended. Once you have finished planting
according to the instructions specific for each species you cover
the soil in the baskets with a layer of stones; this keeps the fish
from eating the roots of the plants or from pulling out the roots
and causing the soil to mix with the water.
Nympheas, shallow water species and bog plants as well as oxygenating
plants are a good well-rounded approach; add a few of each plant
and you'll see a healthy and vibrant ecosystem! Ensure the rhizome
of your Nympheas are placed at a 45 degree angle in the soil, this
helps them really flourish, and it is a good idea to add a pellet
of plant food into the basket on planting! Nympheas can be placed
in waters from 6 inches deep to up to 26 inches although it's probably
best to plant them closer to the surface if they haven't fully developed
as the season can be short and you want to enjoy the flowers! The
shallow water and bog species are planted at water level or to a
depth of around 12 inches depending on your chosen plants. Oxygenating
plants help provide your fish with beneficial oxygen and are typically
below the surface planted in baskets on steps that are from 8 to
36 inches deep. Make sure you get a plant that is not invasive or
you will have a problem!
Pond
Sealant
Soilfloc® Sealant is the best polymer based sealant available
for your canal, irrigation ditch or watering hole. Specifically
designed to find leaks, whether in the floor, the wall or through
rock formations and seal them. Soilfloc® custom blends linear
and cross-linked polymers to seal any type of soil, for any
sized project.
Muck
Remover
The biological removal of muck and sludge from ponds, lakes
and canals is an ecological way to eliminate organic sediments
from ruining shorelines and making swimming impossible. Safe
muck eating bacteria are blended from anaerobic bacterial mixtures
and enzymes that specifically target the thick, black, stinky
muck that is common in ponds and lakes.
Solar
Aeration | Bacteria
& Clarifiers | Large
Ponds & Lakes | Pond
Pumps | Information
& Articles
|
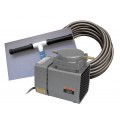
Maintaining
Water Levels
Any pond will lose water due to evaporation especially on hot days
or if you have a splashing fountain or a waterfall as the droplets
turn to mist they are evaporated. Hot direct sun will cause the
water level to drop and this can be harmful for the plants or koi
or goldfish.
Using a float valve is the simplest way to keep the level of your
pond constant. The small float ball on the end of a brass arm, similar
to what's in the back of most toilet bowls, will turn on a small
valve whenever the level drops below your required level, these
simple floater systems are fully adjustable and an easy to install
4 inch perforated pipe or "French Drain" as it is sometimes called
helps ensure the level never overflows! All of these little devices
can be hidden under stone or behind little garden frogs and gnomes
so they keep out of sight and do their job!
Having a leaking
waterfall or a waterfall pump that doesn't have the right flow for
the head or width of the waterfall can make it look like a leaking
swamp!
Building a waterfall, doesn't really require an expert as much as
it requires expert advice. The thing to do when you are building
a waterfall is to make sure the pumps and liners and rock structure
and waterfall lighting is actually appropriate for the height of
the rock pile and width of the water cascade you are envisioning.
Amazon's
Best Kits
As
an Amazon affiliate we may recieve payment for purchases made through
Amazon.
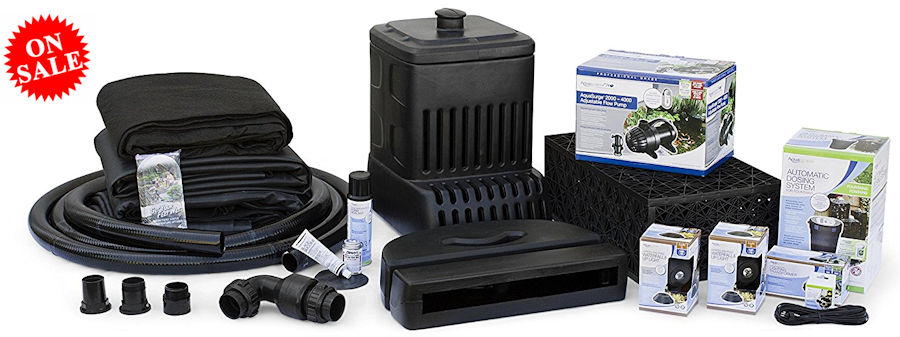
Aquascape's Waterfall Kit comes complete with everything you need
to incorporate the sight and sound of cascading water into your
yard or landscape All necessary components are provided in a convenient,
all-in-one kit that takes the guesswork out of purchasing individual
components The innovative AquaSurgePRO 2000-4000 allows you to adjust
the flow of the pump wirelessly Includes Waterfall Vault makes accessing
your pump and checking water levels quick and easy and Complete
LED Lighting Package for night-time enjoyment Aquascape is passionate
about the products we produce, providing unique products, designs,
and features that stand above the competition.
The Aquascape Medium Waterfall and Stream Kit comes complete with
everything you need to incorporate the sight and sound of cascading
water your yard or landscape, providing up to a 16-foot Waterfall
and Stream. All necessary components are provided in a convenient,
all-in-one kit that takes the guesswork out of purchasing individual
components. The innovative AquaSurgePRO 2000-4000 allows you to
adjust the flow of the pump wirelessly.
The included Pondless Waterfall Vault makes accessing your pump
and checking water levels quick and easy and the included AquaBlox
eliminate the need to fill your basin with large quantities of gravel
and stone. Aquascape is passionate about the products we produce,
providing unique products, designs, and features that stand above
the competition.
f -Waterfall Spillway and Waterfall Vault - Automatic Water
Treatment Dosing System for Fountains - AquaSurgePRO 2000-4000 Pump
Complete LED Lighting Package: Featuring (2) 1-Watt LED Spotlight,
60-Watt Transformer with photocell sensor, 3-way Quick-Connect splitter
and 25 Feet of LVL Extension Cable - 25 Feet of 2" Flexible PVC
Pipe - (5) Aquablox [small] - 10 Feet x 12 Feet Liner - 10 Feet
x 20 Feet Stream Liner - 100 Sq. Ft Underlayment - Welcome Kit with
complete product, installation and care guide
Email us for information or with your questions.
 Pond
Report Store Pond
Report Store
The
pond report also has information on:
Algaecides
& Bacteria | Deicers
& Bubblers | Weed
Removal | Liquid
Bacteria | Pond
Pumps & Fountains | Aeration
| Winter
Pond Care | Algae
Control | Pond
Liner | Muck Pellets |
Build
a Solar Aerator | Rotary
Vane Compressors | Floating
Fountains
| Building
a Pond | Linear
Air Compressors & Pumps | Weighted
Airline | Diffusers
& Airstones | Solar
Aeration Systems | DC
& Battery Operated Pumps | Windmill
Aeration | Dock
Bubbler Packages | Building
a Waterfall |
Dyes & Colorants | Consultations
| Questions &
Answers
| Links
& Resources | Eurasian
Milfoil
| |
Mosquito Control | Pondkeeper
Treatments | Aeration
Systems | Septic
Bacteria | Grease
Trap Blocks |
Compost Aeration | Dissolved
Oxygen Meters | SOTR
& Pumping Rates |
Portable
Generators |
Duckweed
Control |
Pond
Plans & Pond Building Books & Guides |
© 2007
- 2024 The Pond Report
about
us | privacy
policy | contact
us
|